I made a visual book list of the books we are going to read aloud or independently. This gives my kids assignments or suggestions. I keep it posted on our mini anchor chart. You are welcome to print this list out if you like. Simply right click on the image and save to your computer. Read on!
Serious Savings of the Possum
This blog was created as an idea to share my creativity, my cooking, my money saving strategies, and anything else that comes to mind.
Friday, August 4, 2017
Wednesday, March 1, 2017
Layers of the Earth Unit study
Please keep in mind this unit is made for my autistic 2nd grader
(some material is more 1st grade/Kinder level).
We read The Magic School Bus: Inside the Earth book together.
This book would be a great way to learn about the different kind of rocks too. Maybe our next unit?
Another great book is Planet Earth/Inside Out by Gail Gibbons.
I found a free coloring page: The Layers of the Earth from My Mommy Style blog.
I printed and put on construction paper some 3 part cards of the different layers of the Earth. I used THIS set of free cards. I found another set of free cards HERE if you are interested.
We built models of the earth using Play Doh. I bought the medium containers of Play Doh at Walmart for $0.50 each. I spent $2.50 to get the 5 colors I needed. I used:
Red: Inner Core
Orange: Outer Core
Yellow: Mantle
Blue: Crust + water
Green: land
You could easily make your own Jello Play Doh with THIS RECIPE. That would make the Play Doh smell like different flavors to further add a sensory experience to this. I was feeling lazy.
We built rather small models of the earth because it was difficult for my daughter to control the Play Doh in bigger sections. You could easily build larger models if your child is more skilled with Play Doh.
I printed these Toothpick Flags to label the sections of our Play Doh earth. I found a blank template using Google--Sorry whoever made this. I can't find the original link. I added the labels and left some blank for older kids who want to write it themselves. Click on the image above and print if you like.
If you are looking for additional ideas:
National Geographic has a wonderful page with information for kids.
My Mommy Style made chocolate treats to show the layers.
Another idea would be to make Rice Krispie treats of various colors and build the earth model.
Maybe a fruit plate with various fruits in circles to represent the layers?
I hope this inspires someone else to have fun with science.
~Possum
Sunday, June 28, 2015
Bobcat Badge Lapbook
***Revised Jan 24th, 2016: After many requests for these printables, I have made them available online on my TPT store. They are free and include a printable mini storybook to go with it.
My son is now a scout. How did this happen? I swear he was just a baby last week. Yikes!
For the Storybook go HERE.
For the rest of the printables to make the lapbook go HERE.
DOWNLOAD HERE
Also, if you don't have access to the extra pamphlet, go HERE.
***DOWNLOAD HERE
Also, if you don't have access to the extra pamphlet, go HERE.
My son is now a scout. How did this happen? I swear he was just a baby last week. Yikes!
I have a confession. I know NOTHING about scouting. Yes, nothing. Nada. Zip. Zilch. Zero. Nothing.
And then I found out that the whole scouting program was changing just as my son is starting. So, the leaders are not really knowledgeable about the program or the requirements. Great.
I am not comfortable knowing nothing and having no one else really know what they are doing either. I decided to take it upon myself to actually read the manual. Weird, I know. This whole badge thing seems pretty straight forward.
We are starting in the beginning with the Bobcat rank. I decided to make a lapbook to have a visual for all the requirements for Bobcat. My son really learns from lapbooks and they are nice to keep for future kids too (like his younger brother who is still a baby--and I want him to stay that way). Without further ado, here is the Bobcat lapbook, in picture form.
This is the front.
The inside as a whole.
I don't have close ups of the Scout law (black far left center) or
the exercises out of the booklet (yellow far right center).
I simply printed those and stuck them directly to the lapbook.
#3 Just a foldable book.
Inside of foldable book.
Red pocket with a copy of Scout Oath and Scout Law.
I am making a game out of these, but that is another post for another day.
#4, matchbook style
Inside with meaning and picture.
This was an extra that was not really part of the Bobcat badge.
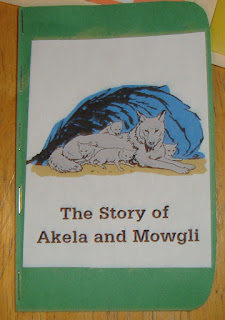
Since I know nothing about scouting and the manual kept referring to Akela, I looked it up. The old manual told a whole story about Akela and the meaning behind the term. The new manual doesn't explain it. I found a printable version of the story and made a cute little book to read to my son. He needs to know this stuff too.
I found a pdf of the old wolf manual.
Click on THIS and print pages 14-19.
I printed 4 pages per sheet. I used construction paper, glue, and staples and made a book.
I found a pdf of the old wolf manual.
Click on THIS and print pages 14-19.
I printed 4 pages per sheet. I used construction paper, glue, and staples and made a book.
Front of the book
Two of the pages. It ended up being 6 pages long.
My son liked listening to the story and understanding the term.
#2 This is a nice break down of the Scout Law.
Each of the character traits is defined underneath.
This is a poor picture of the front of the Scout Law spot.
#5 Cub Scout motto. This is a layered book.
2nd page of layered book has the meaning.
The last page of the layered book is the motto with picture.
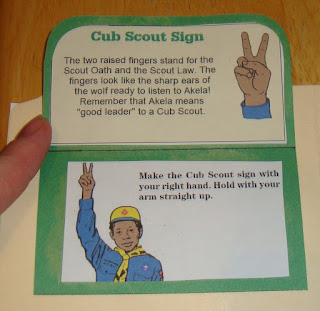
#6 Cub Scout salute is a book with tabs.
2nd page of Cub Scout salute. This has the meaning.
This picture also gives a nice close up of #7.
It needs to be done outside of the lapbook, but needs a reminder here.
last page of Cub Scout salute with picture.
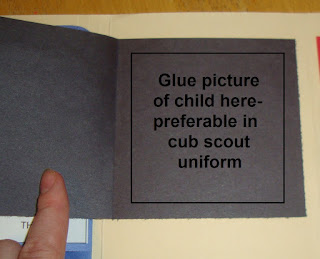
This is just a fun book with the Scout Oath on top.
The inside of the Scout Oath book.
I am going to take a picture of my son in his uniform and
put it in the inside page. It will be fun to see how much he will grow.
In case you missed the note on the top, the free printables can be found at the following links:
In case you missed the note on the top, the free printables can be found at the following links:
For the Storybook go HERE.
So, here is the whole lapbook. If you have questions, just leave me a comment.
Monday, September 22, 2014
Hot Wheels Wall Garage
My latest wooden creation. It is a Hot Wheels car wall garage.
This project cost me $3
Yup--$3.
Supplies List if you want to make your own:
-(3) 1 in X 2 in X 8 ft boards - $0.99 each at Home Depot
-Nails - already had, but cost about $1 for a small pack.
-Wood Glue - already had, but cost about $3 for a small bottle
-Corner braces with screws - already had, but cost about $2 for a 4 pack
~Another option would be L brackets to hang it
-Hammer - already had on hand
-Saw of some sort to cut wood- but Home Depot will cut the wood if you need it for a price.
Note: Home Depot gives you 4 cuts for free and other cuts after that are $0.50 each. If you make the one I have above, it requires 9 cuts and would cost you $2.50 to make them cut it. You decide if that is worth it.
Here is the breakdown:
Wood $3
Nails $1
Glue $3
Braces or brackets $2
Total:------- $9
So, if you have a hammer and some sort of saw to cut the wood, then it will cost you $9.
If all you need is the wood, then it will cost you $3 plus tax.
Personally, I think I would pay $10 for a shelf that will keep those dumb, feet-killing cars off my floor. I got lucky and only paid $3 and now want another one. Maybe I need to add that to my list for tomorrow...
I cut the 8 feet boards into 2 feet strips. I needed 11 total for the project directly above. I ended up making the sides a little shorter and having one less shelf on the final project. My wall had an outlet that was badly placed and required my original project to be modified.
You can see two outlets in the picture and there is another one hidden by the baby. Ish. Why did all the outlets have to be in the exact same spot? And why did it have to be the spot I wanted to hang something?
I got the handy guys at Home Depot to cut my boards in half and then I cut them further once home. I taped all the shelf boards together with masking tape. I then sawed each side to make them all square. It worked pretty well. If you are a real woodworking person, please stop cringing and just do it your way.
I then glued the pieces together and nailed them later for good measure. I attached the corner braces or L brackets to the shelf and wall. Then my kids added the cars and I admired my handy work.
Tuesday, July 15, 2014
DIY Practice Keyboards
After I saw this blog post by Color in My Piano, I really wanted a practice piano. I liked hers, but I wanted something a little bigger that could be used for overall piano practice.
I was initially scared of the idea and kept putting it off. Now I wish had done it sooner. It is surprisingly simple.
Materials needed:
1. Board of some shape (I bought a 0.5 inch thick board measuring 5.5 inches by 24 inches at Home Depot)
2. White paint and paint brush (or you can buy a pre-painted board for a little more money)
3. 1 Paper-size Black foam (I bought the kind that has a sticky back that you peel off --so worth it!)
4. Scissors
5. Black permanent marker (fine tip)
6. Ruler and pencil for measuring
I didn't keep track of exactly how much this cost, but I will give you an estimate. I already had scissors, ruler, pencil, and black marker, so those were free. The boards I bought were pre-cut and sanded, which means a little more money, but about $6 each. I bought a sample of white paint, about $3. Paintbrush was somewhere around $0.50. Black foam was about $2.
So here is the breakdown of cost:
-- please remember these are estimates --
2 Boards: $6 each ($12)
Paint $2
Paintbrush $0.50
Foam $2
TOTAL: $16.50 ($8.25 each)
As always, the more you make, the cheaper it is.
Also, if you just buy a board and cut it into pieces, it would cost about $4 each for 3 or 4 of these.
Another option is to go to craft store and buy pre-cut slats. They come in packages of 6-ish for around $3. They are quite a bit smaller, but much more affordable. I have even seen BBQ slats at the Dollar Store that could be used. The possibilities are endless with this initial idea.
So here is the instructions on how to make these:
1. Take board of your choice and paint it white. If you bought a pre-painted board, skip this step.This step takes the longest and you have to allow it to dry overnight. Looking back, I really should have used spray paint. That would have been sooooo much easier.
2. Once board is white and dry, draw your lines 7/8 inch apart. I did this step with a ruler and a pencil first, then traced with a black permanent marker next.
2.5 (Optional step): You can paint a layer of gloss over your keyboard to seal in the colors, but it is not necessary. Be warned: if your kids decide to draw on these with permanent markers--it will not come off-whether you glossed it or not.
3. Cut out your foam pieces. These should be 0.5 inch wide by 3.5 inch long. If you are using a shorter board (as in from top to bottom, not how wide), simply make your black keys shorter (smaller than 3.5 inch).
4. I found the middle key on my keyboard and decided that was middle C. I did not write C on my piano, it is just on the picture above for your benefit. I then placed the black foam accordingly around that spot. I did it first without sticking anything, then slowly attached each black key.
5. Find some resources of things to do with your fancy new keyboard:
Come back another day and I will make a post about things that can be done with a practice piano.
For a time frame:
Painting: 20 minutes (but overnight to dry)
Draw on lines: 20 minutes
Cut out foam: 20 minutes
Attach foam: 15 minutes
TOTAL: 1 hour 15 minutes
~Possum
Sunday, May 4, 2014
Science Experiment for kids
What do you do when you need an activity indoors that will keep your kids occupied for more than 10 minutes? Enter the science experiment.
All you need to make this happen is baking soda, vinegar, food coloring (optional), pipette droppers, and a big pan.
I simply dumped some baking soda inside a 9 x 13 clear pan and shook it around to get an even layer. I used the kids' three-compartment plates and filled them with white vinegar. I dropped some food coloring into each compartment for added fun.
I gave each kid their own pan, plate (with vinegar), and a pipette. I found the pipettes at Walmart for $1.49 for a two pack. They were near the pharmacy.
Simply drop some vinegar into your pan of baking soda and watch as your colors fizz and turn into crazy creations.
This would be lots of fun on a rainy afternoon or a hot summer day when it is too hot outside. OR you can do this just because it is lots of fun. This is something we will definitely be repeating.
~Possum
Subscribe to:
Posts (Atom)


