Saturday, February 15, 2014

Sight Word I-Spy Bags

I made these using felt, clear plastic material, large lima beans, and colored pasta.
Each one of these took a piece of felt which was
half (hamburger end) of an 8 1/2 by 11 inch piece of felt. 
I took a regular size piece of felt and cut it in half (8 1/2 by 5 1/2 inch)
and then folded it to make the bags. 

I cut out a rectangle piece on the front and sewed a piece of
clear plastic material (it is the material you use as a clear table cloth or shower curtain).
 Here is a close up of one bag.
I took large lima beans and wrote on them with permanent markers.
I then put colored pasta as extra stuffing.
I sewed a letter or number on the back (before you stuff or sew it together). 
This helps me remember what sight words are in each bag.
P = Preschool, K=Kindergarter, 1=1st grade, 2=2nd grade, 3=3rd grade.
I also made a laminated list that goes with each bag.
~Possum

Butterfly Lapbooks

 I thought I would share the Butterfly lapbooks I made for my kids.
The one on the left is for first grade and the one on the right is preschool/kindergarten level.
Keep in mind that these are the duplicates I made for my sister's kids.
 This is the 1st/2nd grade level lapbook cover. There is a diagram of butterfly parts on the top.
The butterfly ballad (song) is in the green border. I got that from SuperTeacherWorksheets.
The red pocket contained pictures of butterflies for a game inside.
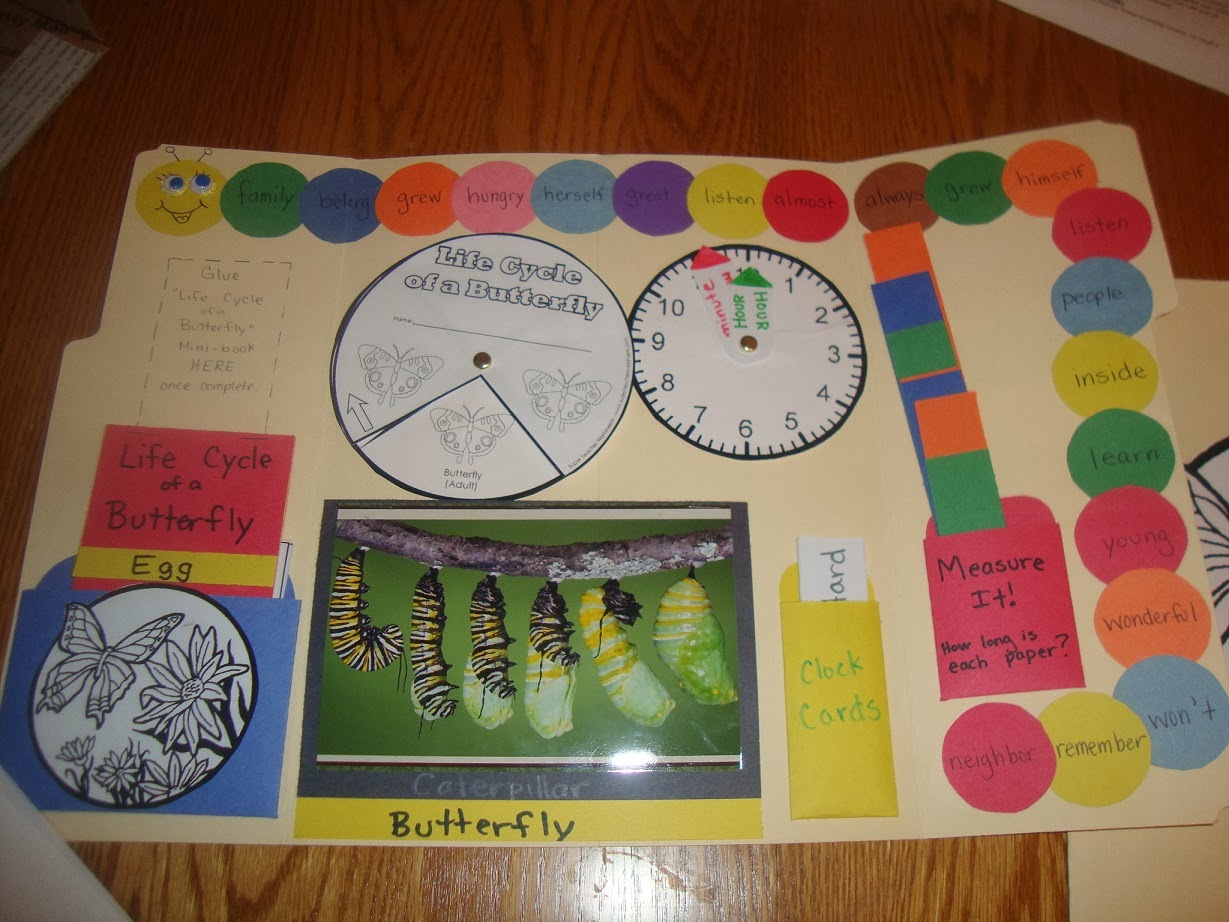
 This is inside the folder.
There is a life cycle of a butterfly circle that turns to reveal each stage in the cycle.
I found this on Super Teacher Worksheets too.
The strips of paper on the right are for practicing measuring.
Each strip is to the nearest inch or nearest centimeter. 
The life cycle of a butterfly flip book (red and yellow book on left) is for each stage in the life cycle.

The caterpillar has sight words and I made a set milk jug lid sight words to match.
This is a simple matching game of matching sight word to caterpillar.
And this is only a few sight words, not all of them.
See below for the lids and painted box I made to go with this.
Notice I made a set of numbers and capital letters to go with this too.
 Here is another view of the inside of the 1st/2nd grade folder.
The book I'm holding up in the picture is just pictures of the
progression of a caterpillar to a chrysalis and the coming out of a butterfly. 
I found those online by using a search engine (keyword: butterfly metamorphosis).
A great site is TheButterflySite.com.
Look up their life cycle page for these photos.

The cards on the left are what was in the blue pocket.
They are sequence cards of the stages of a butterfly.

The clock cards are on the bottom right and go with the clock face.
 I cut up a large index card into strips and put three different times on them.
I put three times that are easy, medium, and hard.
 This was a stand alone sheet that I laminated and stuck inside. 
This has room for math problems that can be used with a white board marker.
It can be erased and used many times.
 Here is the back side of the laminated sheet.
This is to be used the butterflies that are in the red pocket
on the front of the lapbook. The game is to pick several butterflies
and sort tally up how many have a certain color.
Then graph the results on the graph below.
 This is the inside of the Pre-K/K lapbook.
I made a caterpillar with lower case letters of the whole alphabet.
I made matching lids with capital letters to match for tactile work on letters.

I have a colors book on the left that is a flip book for the rainbow colors.
The book below is for the basic shapes and is also a flip book.

I made sequence cards, life cycle circle, and easy clock cards like the other folder.
The red pocket contains number practice cards. See below for more information.
These are the counting cards and I made a set of lids
that have the numbers 1-10 on them to go with these.
I used a butterfly stamp and different colors to make these.
I made a set of lids with each stage of the butterfly cycle for tactile arrangement too.

If you want to see the rest of the butterfly unit, check the label "Butterfly unit."
~Possum

Saturday, January 4, 2014

The Great Chicken Experiment: Review


This is the end of my adventures of taking two chickens and making them feed two adults for 7 days. I originally aimed for having one chicken feed one adult for 6 days, but I made it stretch more. If you count that I have two freezer meals in my deep freezer, then I guess I could say I used the chicken for eight meals.

Let's recap. I took two chickens, like the one above and cut it up into pieces. Each meal was made with pieces from the original birds.

Here are the meals for each day in picture form.

Here are some numbers for you math-types. I bought two full chickens for $11.74. I made that chicken stretch for 7 meals. That works out to $1.68 per meal OR $0.84 for each person. That's pretty good for my budget.

$1.68 per meal for 2 adults or $0.84 for each person

So, what do you think?
Possum wants to know...

The Great Chicken Experiment Day 7

 Day 7-we made it! I made chicken enchiladas.

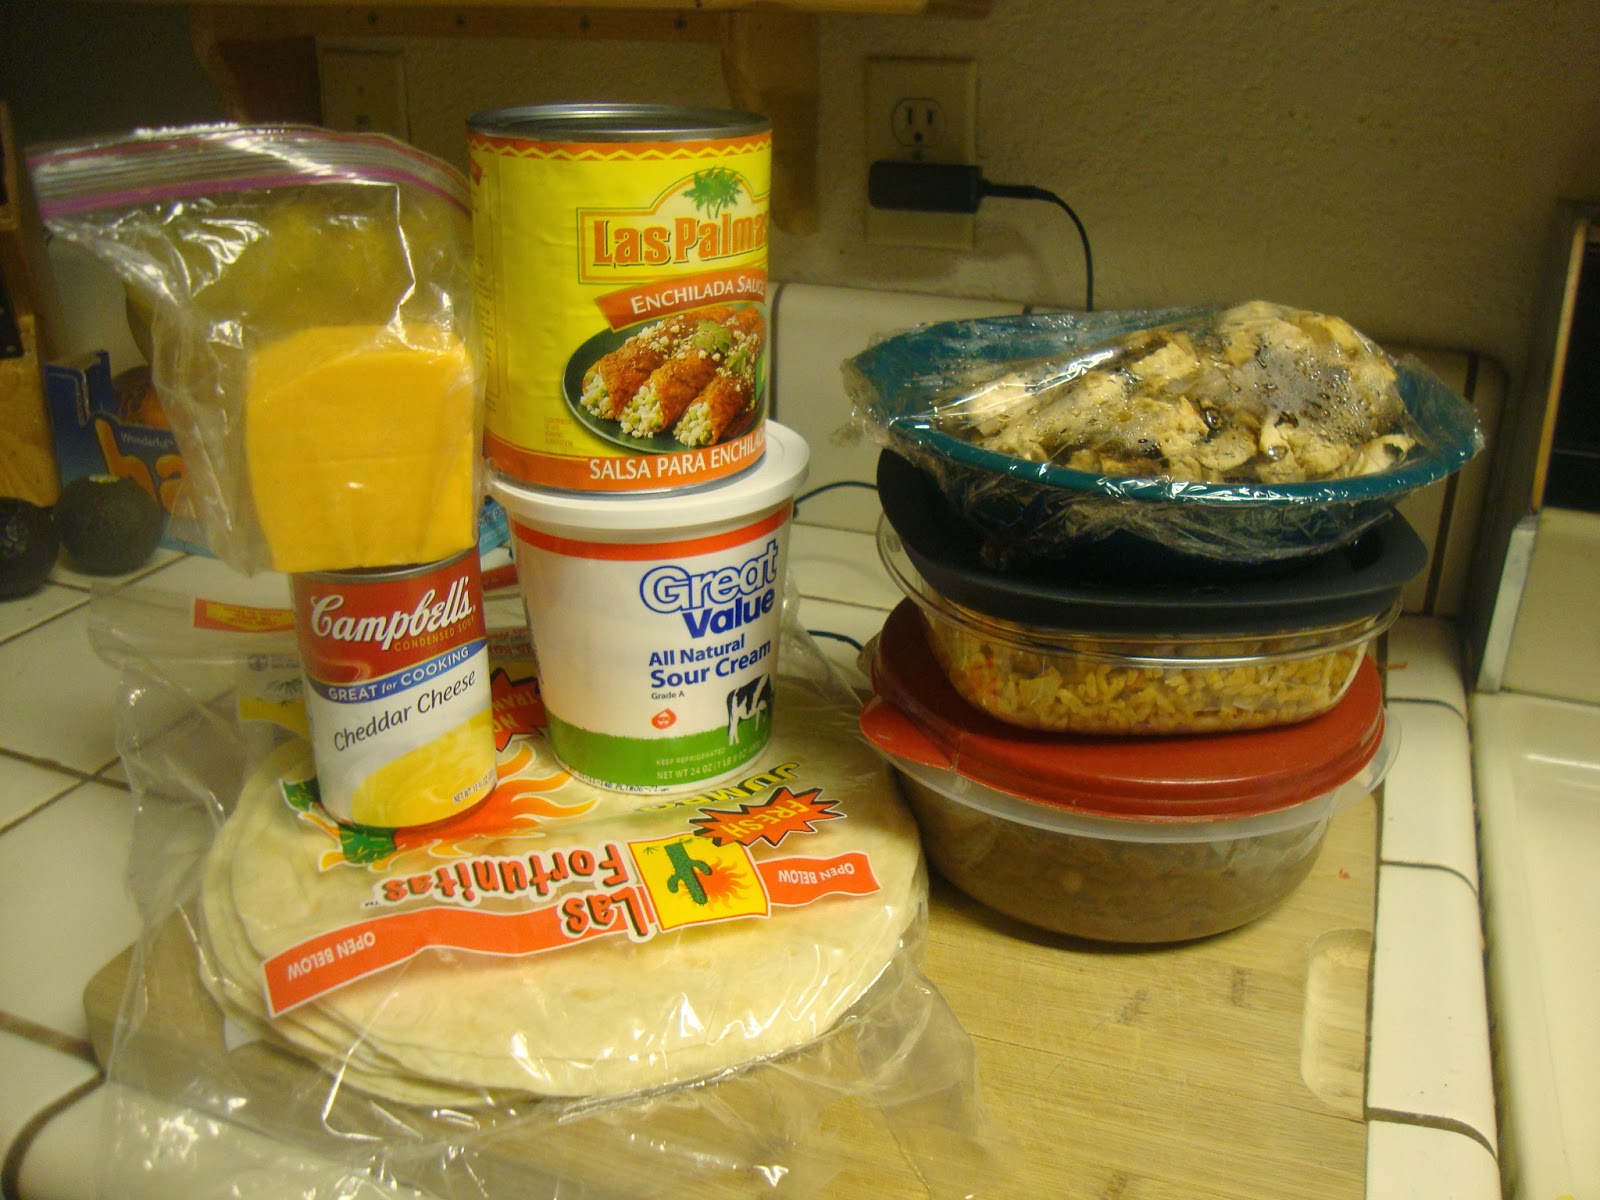
 Here are my ingredients:
flour tortillas (I used 6, but it depends on how thick you want them)
1 cup sour cream
1 cup shredded cheese (I used cheddar)
1/2 cup shredded cheese for topping
2 cups cubed or shredded cooked chicken
1 can cream of chicken condensed soup
1 can Red or Green Enchilada sauce
optional: canned or homemade beans and rice

Preheat oven to 350 degrees.
 Start by putting sour cream, 1 cup cheese, cream of chicken soup, and chicken in a bowl.
 Mix all those ingredients together to make a cream filling.
 Lay tortillas flat and put filling down the center.
I purposely didn't specify how much because that
depends on how thick you want your enchiladas.
 The next two steps are optional.
I topped my cream mixture with homemade pinto beans.
 After the beans, I put homemade spanish rice on top. 
 I rolled the enchilada like a burrito and placed in a greased pan.
I used a 8 x 8 pan, but a 9 x 13 would work too.
 I managed to make 4 huge enchiladas.
 Cover the enchiladas with enchilada sauce. I used red sauce.
 Sprinkle your extra cheese on top.
 Cover your pan with foil.
 Bake in 350 degree F for 35 minutes.
If you like a little crunch on top, remove the foil for the last 10 minutes.
 
Here is dinner for day 7.

Keep in mind that the recipe did NOT make only 4 enchiladas. Mine made 6. I put the other two in individual freezer containers and intend to use them as an easy meal for another night.

Not bad for one nights work.
~Possum

Thursday, January 2, 2014

The Great Chicken Experiment Day 6

 I admit I got lazy today and didn't stick to my original plan. We went out to lunch and got burritos. Having enchiladas for dinner was a bit over the top. So, I made grilled chicken salad instead. Sorry, I didn't take step by step pictures because I just tossed everything in a bowl.

So, here is the chicken salad and a side dish of oven
roasted broccoli and carrots with a bowl of sliced mangos.

I still have a large bowl of left over grilled chicken.
I will make something for dinner tomorrow with that.

Wednesday, January 1, 2014

Happy New Year

I am wishing everyone a Happy New Year! I have decided to try my hand at sticking to my New Year's resolutions and you get to help me stay on track. I figure if I tell you my resolutions, you can help me be more accountable. So, here is 2014's goals:

1. Grow a garden
2. Get organized and de-clutter my crowded house.
3. Blog at least once a week.
4. Drink at least one glass of water every day
    (this is in place of my usual diet/get healthy resolution)
5. Go on an adventure

I have to admit, sometimes I make resolutions and I get more than I expected. For example, a few years ago, I made a resolution to start dating. I was married and pregnant by the end of the year. Talk about overachieving. I'm a little more careful in making resolutions now.

What are your New Year's resolutions?
~Possum